Introduction to Red Velvet Waffles
If you’ve ever indulged in the delightfully unique flavor of red velvet cake, then you’re in for a treat with red velvet waffles. These irresistible breakfast gems capture all the charm of their cake counterpart while adding a fun, crispy twist. Imagine waking up to the rich, slightly cocoa-flavored waffles drizzled with a luscious cream cheese icing—talk about a morning uplift!
What makes red velvet waffles so special?
At first glance, the vibrant crimson hue of red velvet waffles stands out, making them an eye-catching addition to your brunch table. But it’s more than just the color! The combination of flavors—subtle cocoa, vanilla, and maybe even a hint of buttermilk—creates a scrumptious taste profile. The history of red velvet dates back to the 1920s, but this modern take infuses waffles with its rich legacy while turning your breakfast into a celebration.
The beauty of these waffles lies not only in their flavor but also in their versatility. They can be paired with various toppings, from fresh fruits to whipped cream, allowing you to get creative. Why not try adding some turkey bacon or sautéed fruits to your plate for a full breakfast experience? You can even serve them as a sweet treat for brunch gatherings, impressing your friends and family with minimal effort.
Nutrition-wise, while red velvet waffles do have their share of sugar and carbs, they’re highly adaptable. You can switch out some flour for whole grain or add protein powder to boost their nutritional profile. Check out resources from Healthline on the benefits of whole grains if you’re interested in making healthier swaps.
So, are you ready to elevate your breakfast game? Dive into the recipe for red velvet waffles with cream cheese icing, and let’s bring a bit of flair to the most important meal of the day! Trust us, once you try these, every other waffle will seem a bit dull in comparison.
Ingredients for Red Velvet Waffles
Creating red velvet waffles is a delightful way to elevate your breakfast or brunch game. The rich, crimson color and the subtle cocoa flavor pair perfectly with a sweet cream cheese icing, making every bite unforgettable. Here’s what you’ll need to whip up this mouthwatering treat:
- All-purpose flour: About 1 ½ cups will create a fluffy base.
- Unsweetened cocoa powder: Just 2 tablespoons will add that signature chocolatey undertone.
- Baking powder and baking soda: These leavening agents are essential to achieve the perfect waffle texture.
- Salt: A pinch enhances all the flavors beautifully.
- Granulated sugar: ¾ cup balances the cocoa’s bitterness.
- Eggs: 2 large eggs will help in creating a rich batter.
- Buttermilk: 1 cup adds that classic moisture and tangy flavor.
- Vegetable oil: ⅓ cup keeps your waffles perfectly moist.
- Vanilla extract: 1 teaspoon brings a warm, sweet aroma.
- Red food coloring: About 2 tablespoons for that iconic hue.
Feel free to experiment with these ingredients! For a twist, consider adding a splash of almond extract or even spices like cinnamon. Check out Food Network for more creative ideas and variations. Happy cooking!
Step-by-step Preparation of Red Velvet Waffles
Welcome to your culinary adventure of making red velvet waffles! This delightful twist on a savory classic combines the rich, velvety flavors of red velvet cake with the crispy texture of waffles. It’s a fantastic dish perfect for brunch or a cozy breakfast. Let’s dive into the step-by-step preparation to make these scrumptious waffles with an indulgent cream cheese icing.
Gather your ingredients
Before we get cooking, let’s make sure you have everything on hand. Here’s a straightforward list of what you’ll need for these red velvet waffles:
-
Dry Ingredients:
-
1 cup all-purpose flour
-
1 tablespoon cocoa powder
-
2 tablespoons sugar
-
2 teaspoons baking powder
-
1/2 teaspoon baking soda
-
1/4 teaspoon salt
-
Wet Ingredients:
-
1 cup buttermilk (or make your own with milk and vinegar)
-
1 large egg
-
1 teaspoon vanilla extract
-
2 tablespoons vegetable oil
-
1 tablespoon red food coloring (or more for a deeper color)
-
For the Cream Cheese Icing:
-
4 ounces cream cheese (softened)
-
1/4 cup powdered sugar
-
1 tablespoon milk
-
1/2 teaspoon vanilla extract
Make sure to check your pantry for these items to ensure a smooth cooking experience!
Prepare the dry ingredients
With your ingredients ready, it’s time to tackle the dry mixture. This part is pretty straightforward, but it’s essential for creating a good texture in your red velvet waffles.
- In a medium-sized bowl, combine the all-purpose flour, cocoa powder, sugar, baking powder, baking soda, and salt.
- Whisk everything together until you see a uniform blend. This aerates the dry mix, helping your waffles rise beautifully when cooked.
If you’re curious about the role of baking powder vs. baking soda, it mostly comes down to acidity and leavening power—trust us, they matter!
Mix the wet ingredients
Now, let’s bring those red velvet waffles to life with the wet ingredients.
- In a separate bowl, whisk together the buttermilk, egg, vanilla extract, vegetable oil, and red food coloring. Ensure that the food coloring is mixed thoroughly so you have a vibrant blend.
- Make sure to mix well until the mixture is smooth—a few lumps are okay, but you want to avoid any giant blobs of egg!
Buttermilk gives a nice tang that balances the sweetness. If you’re out of buttermilk, you can make a substitute by combining milk and vinegar—just let it sit for a few minutes!
Combine the wet and dry mixtures
It’s almost cooking time! Now let’s unite our creations.
- Slowly pour the wet mixture into the dry ingredients, folding gently with a spatula until just combined. Be careful not to over-mix; small lumps can lead to a tender texture in your red velvet waffles.
- If the mixture is too thick, you can add a tablespoon of milk to loosen it up slightly.
This is the moment to taste-test the batter (remember, it’s raw!)—the rich red color should make you excited for what’s to come.
Cook the waffles
Finally, let’s get these red velvet waffles cooking!
- Preheat your waffle iron according to the manufacturer’s instructions. You want it nice and hot for that crunch!
- Lightly grease the waffle iron with cooking spray or a bit of oil. This will help prevent sticking and give you that perfect crisp.
- Pour the appropriate amount of batter onto the iron, generally about one cup, covering the grid evenly. Close the lid and cook until the waffles are crisp and have a lovely deep color—about 4-5 minutes, depending on your waffle maker.
- Carefully remove the waffles and repeat the process with the remaining batter.
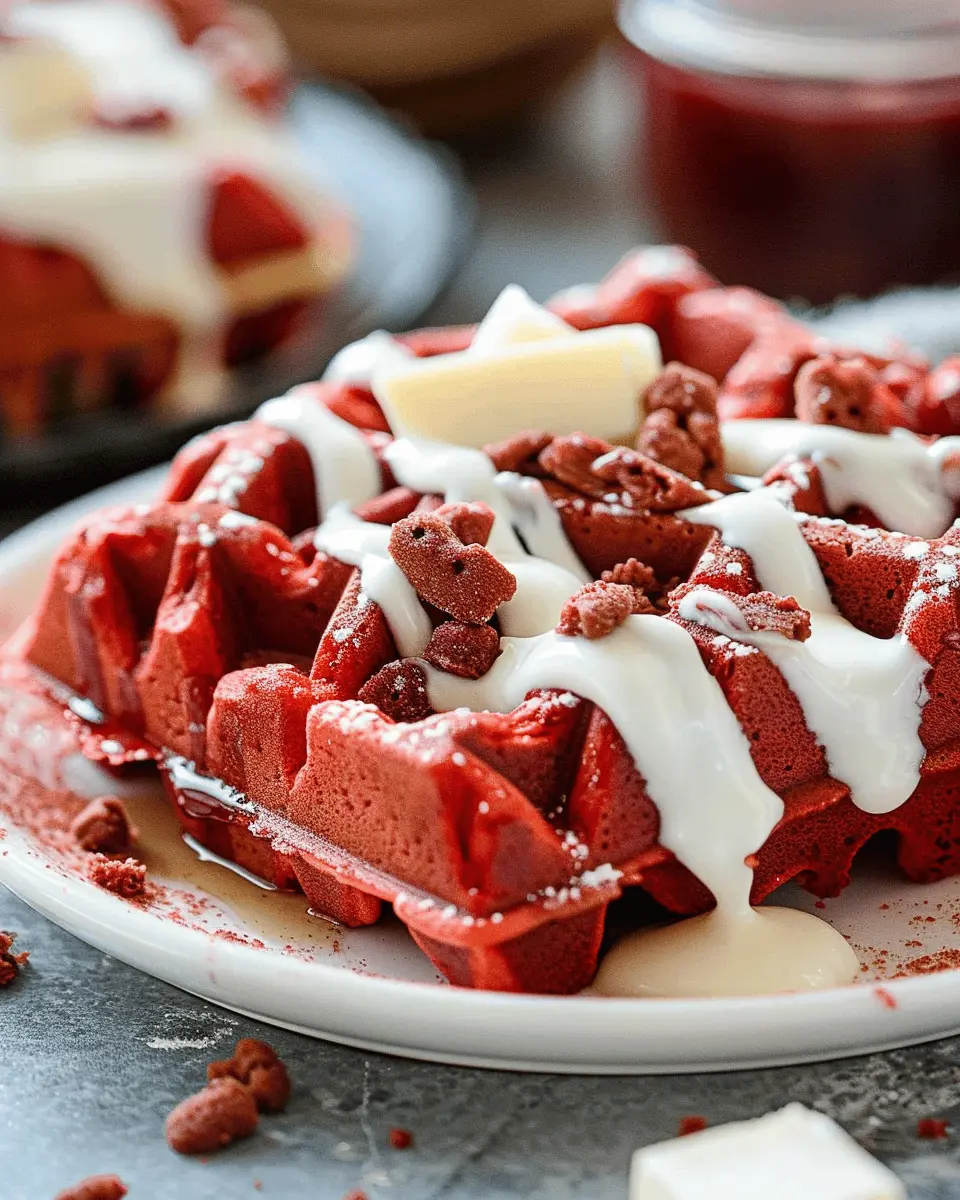
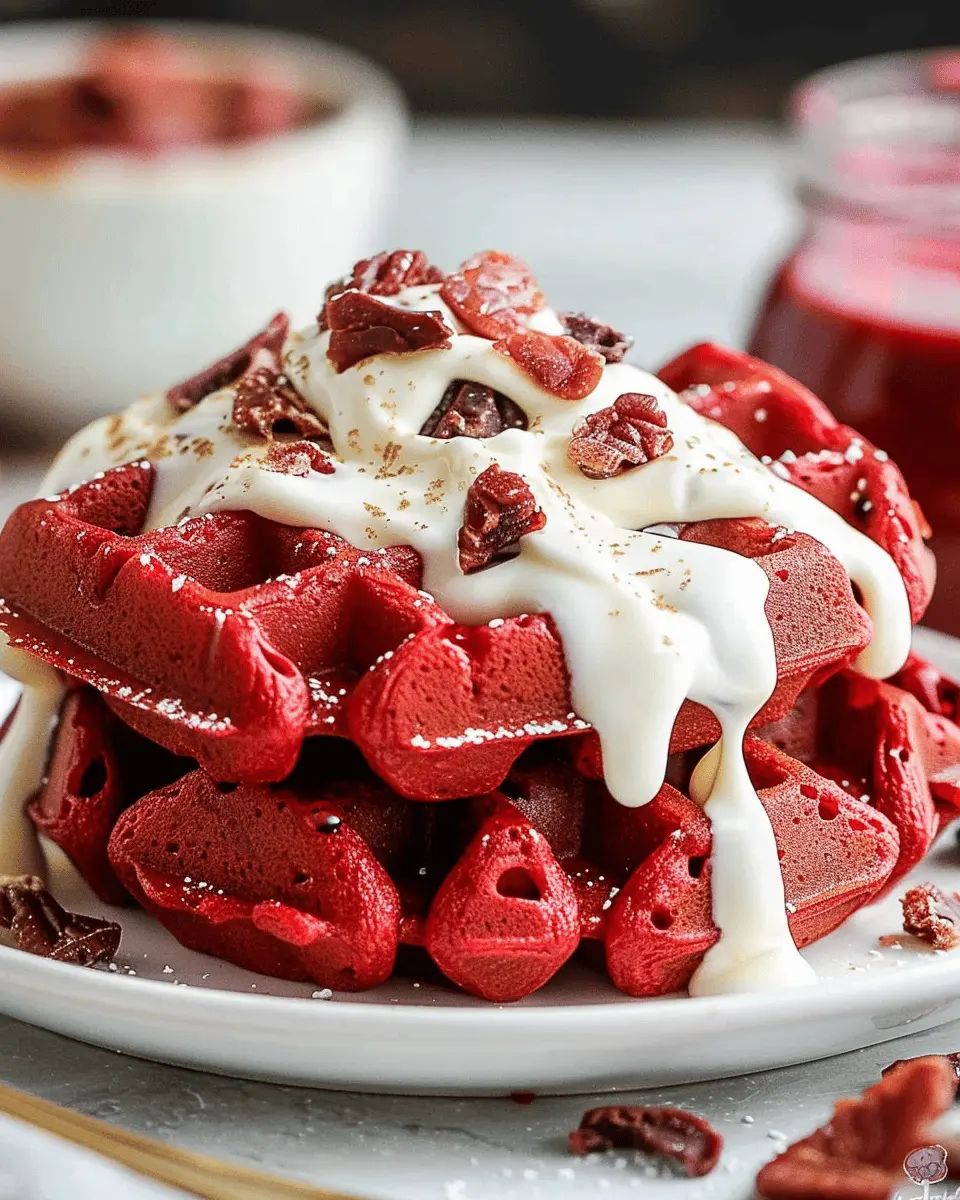
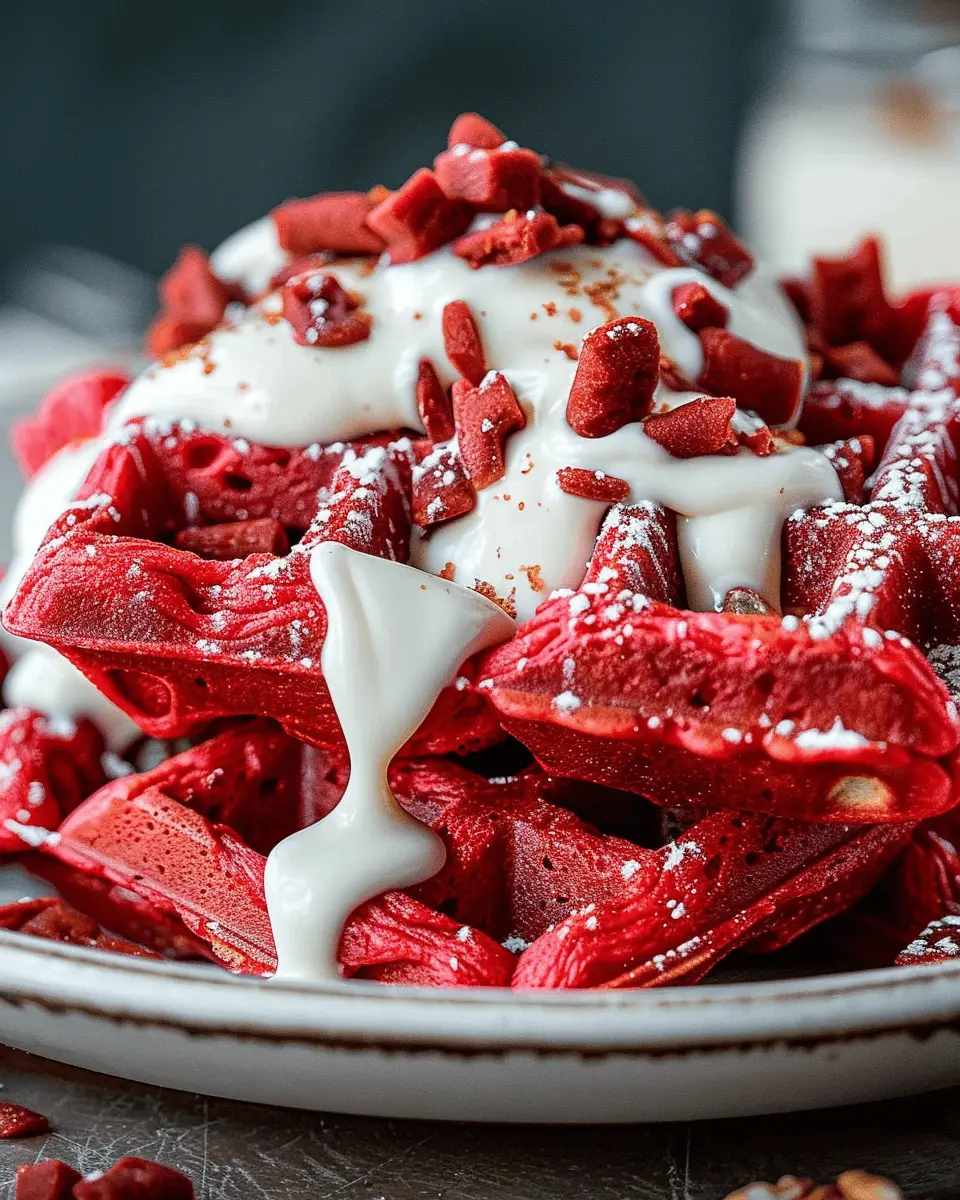
Now, you’ve got a stack of vibrant red velvet waffles ready to be topped! Don’t forget to whip up that cream cheese icing while the waffles cook—just mix all icing ingredients until smooth and drizzle over your warm waffles.
Enjoy your delicious creation! For more delicious breakfast ideas, check out some of my favorite breakfast blogs like Sally’s Baking Addiction and Minimalist Baker!
Variations on Red Velvet Waffles
Red Velvet Waffles with Cream Cheese Filling
Why stop at just a topping? Imagine biting into a warm red velvet waffle bursting with a luscious cream cheese filling. To make this delightful variation, simply take your favorite cream cheese icing recipe and pipe it right into the center of the waffle batter before cooking. The result? A delightful surprise with each bite! Serve these fluffy waffles with your favorite fruits, like strawberries or blueberries, for a fresh twist. This combination not only elevates your breakfast game but also makes it a standout option for brunch with friends.
Gluten-Free Red Velvet Waffles
For those who follow a gluten-free lifestyle, the joy of indulging in red velvet waffles doesn’t have to be sacrificed. Swapping traditional flour for gluten-free flour blends works wonders; many blends on the market provide excellent results without compromising taste. Additionally, you can experiment with alternative flours like almond or oat flour to add unique flavors and nutritional benefits. Just ensure to adjust your liquid ingredients as needed!
Crafting these gluten-free red velvet waffles is simple and rewarding. Pair them with a dollop of whipped cream and a drizzle of maple syrup or honey for a sweet finish. Not only will you impress your guests, but you’ll also cater to various dietary preferences.
These variations offer lovely spins on a classic recipe, perfect for breakfast, brunch, or a sweet treat any time of day. With the flexibility of flavors and ingredients, you can personalize your red velvet waffles to suit every palate. Want more culinary inspiration? Check out this guide to building the perfect brunch spread!
Embracing these creative adaptations makes hosting and enjoying meals even more exciting. Happy cooking!
Cooking Tips and Notes for Red Velvet Waffles
When it comes to crafting delectable red velvet waffles, a few tips can elevate your breakfast game and ensure your waffles are as delicious as they are beautiful.
-
Perfect the Batter: Avoid overmixing your batter to keep the waffles light and fluffy. Just mix it until combined — a few lumps are okay!
-
Temperature Matters: Preheat your waffle iron thoroughly before pouring in the batter. This step prevents sticking and ensures that your waffles come out golden and crispy.
-
Add Your Twist: Feel free to experiment! Consider adding mini chocolate chips or nuts for extra texture. Just remember: a little can go a long way in intensifying that flavor.
-
Serve Fresh: For the ultimate experience, serve your red velvet waffles immediately after cooking to retain their fluffiness.
-
Sauce It Up: Top with cream cheese icing or a drizzle of maple syrup. If you’re exploring alternatives, why not try a berry compote for a fruity twist?
These tips will help you create the perfect stack of red velvet waffles that’s sure to impress! If you want to dive deeper into waffle-making secrets, check out Chef’s Secret Techniques for more insights.
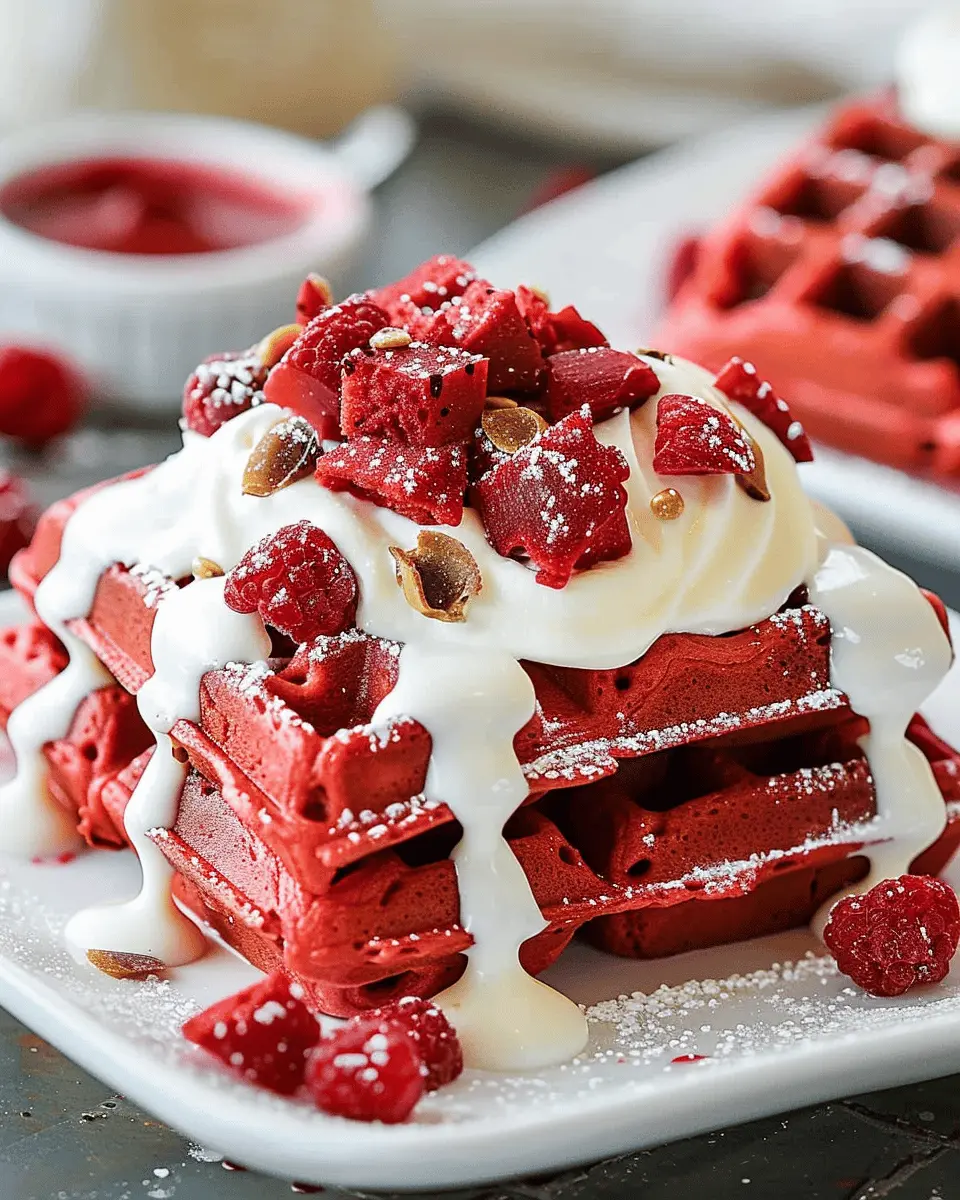
Serving Suggestions for Red Velvet Waffles
Delicious toppings to try
When it comes to red velvet waffles, the sky’s the limit for delicious toppings! You can enhance their flavor and visual appeal easily. Here are some delightful options to consider:
- Fresh Berries: Strawberries, raspberries, or blueberries lend a fresh contrast to the rich sweetness.
- Whipped Cream: A dollop of light, fluffy whipped cream adds a perfect creamy touch.
- Maple Syrup: Drizzling real maple syrup brings in an earthy sweetness to balance the flavors.
- Chopped Nuts: Almonds, walnuts, or pecans add crunch and flavor complexity.
Feel free to mix and match based on your mood and pantry. You can also explore inspiration from sites like Bon Appétit for more tasty variations.
Pairing sides for a complete meal
To round out your red velvet waffle experience, consider pairing them with savory sides for a balanced breakfast. Some great options include:
- Turkey Bacon: This lean alternative offers the necessary saltiness without overwhelming the palate.
- Chicken Ham: A delightful protein that complements the sweetness of the waffles.
- Fruit Salad: A vibrant mix of seasonal fruits can add freshness and additional nutrients to your meal.
These sides not only add variety but also enhance the overall flavor profile. Enjoy your meal as a delightful treat or a special brunch with friends!
Time Breakdown for Red Velvet Waffles
Preparation time
Getting started with your delicious red velvet waffles requires about 15 minutes of prep work. This includes measuring your ingredients, mixing the batter, and setting up your waffle maker. You might even want to take a moment to enjoy the vibrant hue of the cocoa and red food coloring mixture—something about it just feels festive!
Cooking time
Once you’ve got your batter ready, cooking each waffle will take roughly 5-7 minutes. If you’re making a larger batch, factor in a little extra time for the waffles to cook through. Just keep an eye on them; a perfectly cooked waffle is crisp on the outside and fluffy on the inside.
Total time
In total, you’re looking at about 30-40 minutes from start to finish. Perfect for a leisurely weekend brunch or even breakfast for dinner! And let’s be honest, who wouldn’t want to whip up these delightful red velvet waffles at any time of the day?
For those wondering how to serve this treat beyond brunch, check out this article on creative waffle pairings! If you’ve got any tips or personal stories about making waffles, feel free to share them in the comments!
Nutritional Facts for Red Velvet Waffles
When you dive into a stack of red velvet waffles, you might be wondering what you’re actually indulging in. Let’s break down some key nutritional facts so you can enjoy every bite without a worry.
Calories
One serving of red velvet waffles contains approximately 300 calories. This makes them a delightful treat that’s perfect for special occasions without being overly indulgent.
Protein
Each waffle packs in about 8 grams of protein. It’s a nice boost, especially if you’re enjoying them for breakfast and need an energy kick to start your day.
Sodium
Keep an eye on the sodium, as one serving has around 400 mg. While this isn’t excessive, pairing with low-sodium toppings can help keep your meal balanced.
For a deeper dive into the health benefits of red velvet treats, check out Healthline. Enjoy your deliciously vibrant brunch!
FAQs about Red Velvet Waffles
Can I substitute ingredients for dietary restrictions?
Absolutely! Red velvet waffles can be easily customized to fit various dietary needs. Here are a few simple swaps:
- Gluten-Free: Use a gluten-free all-purpose flour blend instead of regular flour.
- Sugar Alternatives: Replace granulated sugar with a natural sweetener like honey or maple syrup for a lower glycemic index.
- Dairy-Free: Substitute buttermilk with almond milk or coconut milk, and use a dairy-free cream cheese alternative for the icing.
These adjustments help retain the delightful flavor while accommodating different diets!
How do I know when my waffles are done?
A crucial question for any aspiring waffle maker! The best way to tell if your red velvet waffles are ready is to pay attention to two things:
- Timing: Most waffle makers signal when they’re done, but a general rule is about 5 minutes.
- Visual Cues: Look for a golden-brown color and steam that stops coming from the waffle maker—this usually means they’re cooked through.
What’s the best way to store leftover waffles?
Leftover red velvet waffles can be a delicious treat! To store them properly:
- Fridge: Place them in an airtight container lined with parchment paper for up to 3 days.
- Freezer: For longer storage, freeze them by laying them flat in a plastic bag, separating layers with parchment paper. They can last up to a month!
When you’re ready to enjoy them, simply reheat in a toaster or oven for that fresh-out-of-the-waffle-maker feel.
Feeling adventurous? Check out more tips on waffle storage. Enjoy your red velvet waffle creation!
Conclusion on Red Velvet Waffles
In conclusion, red velvet waffles are not just a delicious treat but an experience to savor. Their rich, chocolatey flavor combined with the tangy cream cheese icing makes for a delightful breakfast or brunch option that’s sure to impress your friends and family.
Whether you enjoy them topped with fresh berries or alongside crispy Turkey Bacon, these waffles are versatile enough to suit any palate. Plus, they pair beautifully with a steaming cup of coffee or a refreshing fruit smoothie.
So, why wait? Treat yourself to this cozy dish that adds a pop of color—and taste—to your mornings. For more ideas, check out options like this smoothie recipe for the perfect pairing!
PrintRed Velvet Waffles: Indulgent Treat with Cream Cheese Icing

Delight in the rich flavor of red velvet combined with the creamy decadence of cheese icing in these delightful waffles.
- Prep Time: 15 minutes
- Cook Time: 10 minutes
- Total Time: 25 minutes
- Yield: 4 servings 1x
- Category: Breakfast
- Method: Waffle
- Cuisine: American
- Diet: Vegetarian
Ingredients
- 2 cups all-purpose flour
- 1/4 cup cocoa powder
- 1 tablespoon baking powder
- 1/2 teaspoon salt
- 1/2 cup granulated sugar
- 2 large eggs
- 1 1/2 cups buttermilk
- 1/2 cup vegetable oil
- 2 tablespoons red food coloring
Instructions
- In a mixing bowl, whisk together the flour, cocoa powder, baking powder, and salt.
- In another bowl, mix the sugar, eggs, buttermilk, vegetable oil, and red food coloring until well combined.
- Gradually add the dry ingredients to the wet ingredients, stirring until just combined.
- Preheat the waffle iron and pour the batter onto the iron, cooking according to the manufacturer’s instructions.
- Serve warm with cream cheese icing drizzled over the top.
Notes
- For a richer icing, consider adding a splash of vanilla extract.
- These waffles pair wonderfully with fresh berries.
Nutrition
- Serving Size: 2 waffles
- Calories: 400
- Sugar: 22g
- Sodium: 300mg
- Fat: 18g
- Saturated Fat: 5g
- Unsaturated Fat: 10g
- Trans Fat: 0g
- Carbohydrates: 54g
- Fiber: 2g
- Protein: 8g
- Cholesterol: 55mg
Keywords: red velvet, waffles, cream cheese icing