Introduction to Best Homemade Red Velvet Brownies
If you’re a fan of indulgent desserts, you’ve likely come across the striking allure of red velvet treats. But why should you opt for best homemade red velvet brownies over traditional chocolate brownies? The answer lies not just in the delightful flavor but also in the unique twist that red velvet brings to the table.
The Allure of Red Velvet
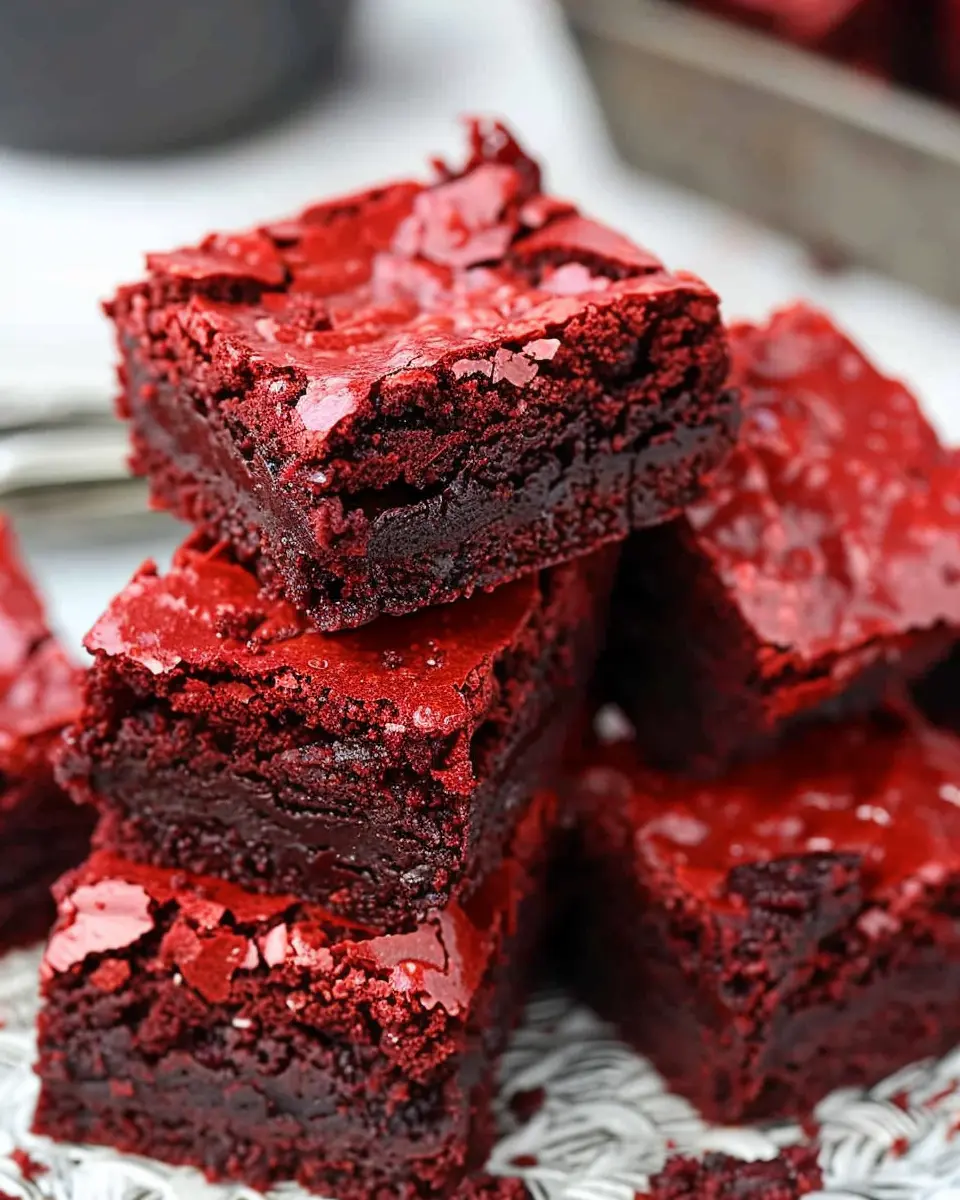
Red velvet is renowned for its rich, velvety texture and a subtle hint of cocoa that beautifully balances sweetness. These brownies are like a love letter to classic chocolate brownies, with the added charm of vibrant red color and creamy cream cheese frosting layers. The beautiful contrast between the deep red and the luscious white topping creates an appealing visual that can elevate any occasion.
Though chocolate brownies have their place, red velvet brownies introduce a unique experience. They are firmly anchored in Southern tradition yet have exploded in popularity across the globe.
Flavor and Versatility
One bite of these best homemade red velvet brownies and you’ll notice the nuanced flavors at play. The tanginess from buttermilk mixed with just the right amount of cocoa provides a delicate balance, making them less heavy than traditional chocolate brownies. They can easily transition from a cozy night in to a fancy dinner party dessert, making them a versatile choice.
The Personal Touch
What makes homemade brownies stand out is the love and care put into the recipe. There’s something deeply satisfying about measuring out ingredients and baking them to golden perfection in your own kitchen. If you’re curious about more ways to enhance your brownies, check out resources such as Serious Eats for tips on achieving the ideal texture.
Making the Move to Homemade
Ultimately, opting for homemade red velvet brownies lets you control the ingredients, ensuring fresh and high-quality flavors without the preservatives found in store-bought versions. So gather your ingredients, set your oven to the perfect temperature, and prepare to impress your guests with a dessert that turns heads and tantalizes taste buds!
Embrace this delightful fusion of flavors, and you’ll soon become the go-to dessert maker among your friends and family. Ready to dive into the recipe? Let’s get cooking!

Ingredients for Best Homemade Red Velvet Brownies
When you decide to whip up the best homemade red velvet brownies, having the right ingredients is crucial to achieving that rich flavor and delightful texture. Here’s what you need to gather for your baking adventure!
Essential ingredients for the brownies
- Unsalted Butter: Gives your brownies a rich flavor and moist texture.
- Granulated Sugar: Sweetens the brownies and helps create the perfect crust.
- Brown Sugar: Adds depth and a bit of chewiness to your brownies.
- Eggs: These bind the ingredients, providing structure and moisture.
- All-Purpose Flour: The backbone of the brownies; it gives them structure.
- Cocoa Powder: Just a touch for that classic chocolatey undertone.
- Red Food Coloring: The signature element that gives these brownies their iconic hue.
- Vanilla Extract: A splash enhances the overall flavor profile.
- Salt: A pinch to balance the sweetness.
Key ingredients for the cream cheese frosting
- Cream Cheese: The star of the frosting, providing a tangy flavor.
- Unsalted Butter: Softened to create a fluffy and smooth texture.
- Powdered Sugar: For sweetness and easy blending.
- Vanilla Extract: Adds a lovely aroma and complements the cream cheese.
- Milk or Heavy Cream: Adjusts the consistency to your liking.
Gather these ingredients, and you’re well on your way to creating your own delicious batch of best homemade red velvet brownies. For more tips on achieving the perfect brownie texture, check out resources from Serious Eats or Bon Appétit.
Step-by-step Preparation for Best Homemade Red Velvet Brownies
Creating the best homemade red velvet brownies is an enchanting experience that beckons you into the magical world of baking. With their rich cocoa flavor, stunning red hue, and luscious cream cheese frosting, these brownies are destined to become a crowd favorite. Let’s dive into the step-by-step preparation process to ensure your baking adventure is smooth and fun!
Gather your ingredients and tools
Before you embark on any baking journey, it’s crucial to gather all your ingredients and tools. Having everything at your fingertips makes the process more enjoyable and reduces the chance of missing a key element. Here’s what you’ll need:
Ingredients:
- 1 cup unsalted butter, melted
- 1 cup granulated sugar
- ½ cup brown sugar, packed
- 4 large eggs
- 1 teaspoon vanilla extract
- 1 tablespoon red food coloring
- 2 cups all-purpose flour
- ½ cup unsweetened cocoa powder
- 1 teaspoon baking powder
- ½ teaspoon salt
For the cream cheese frosting:
- 8 oz cream cheese, softened
- ½ cup unsalted butter, at room temperature
- 4 cups powdered sugar
- 1 teaspoon vanilla extract
- A splash of milk, if needed for consistency
Tools:
- Mixing bowls
- Whisk or electric mixer
- Rubber spatula
- Baking pan (9×13 inches)
- Parchment paper (optional for easy removal)
Having a properly prepped kitchen can make all the difference. Check out this handy kitchen organization guide for tips on setting up your workspace efficiently.
Prepare the brownie batter
Now, let’s whip up the brownie batter! In a large bowl, start by combining the melted butter, granulated sugar, and brown sugar until you achieve a smooth mixture. Often, the key to rich flavors lies in using both granulated and brown sugars – the dark molasses notes in brown sugar add depth.
Next, add the eggs, one by one, followed by the vanilla extract and red food coloring. This not only imparts the iconic color but also excitement as you see your batter transform.
In a separate bowl, whisk together the flour, cocoa powder, baking powder, and salt. Gradually fold the dry ingredients into the wet mixture with a rubber spatula until just combined. Avoid overmixing to ensure a fudgy texture—nobody wants dry brownies!
Bake the brownies to perfection
Preheat your oven to 350°F (175°C). Grease your 9×13-inch baking pan or line it with parchment paper for easier removal. Pour in the brownie batter and spread it evenly using your spatula. Bake for about 25-30 minutes, until a toothpick inserted comes out with just a few moist crumbs. Remember, no one likes a crumbly brownie! While you’re waiting, take a moment to savor the heavenly aroma wafting through your kitchen.
Let the brownies cool
Once baked, allow the brownies to cool in the pan for about 10-15 minutes before transferring them to a wire rack. This cooling period is critical as it helps the brownies firm up nicely, making them easier to slice later. You can sprinkle a little sea salt on top for that perfect sweet-and-salty contrast, which is quite fashionable in the dessert world now.
Make the cream cheese frosting
While the brownies are cooling, it’s time to prepare the cream cheese frosting. In a medium bowl, beat the softened cream cheese and butter together until smooth. Gradually add in the powdered sugar, mixing until you’re left with a creamy and dreamy texture.
If the frosting seems a bit thick, add in a splash of milk to reach your desired consistency, making it easy to spread over your brownies. A good rule of thumb is to make it slightly thicker than you’d like, as it will spread lovely and smooth over the brownies.
Frost your brownies and let them set
Now for the grand finale – frosting the brownies! Once your brownies have fully cooled, generously spread the cream cheese frosting over the top. Don’t be shy; this is where the magic happens, turning your brownies into an irresistible treat.
Let the frosted brownies sit for about 30 minutes to an hour before slicing. This resting time allows the frosting to set and meld with those rich brownie flavors, enhancing the overall experience. Now you’re ready to indulge in the best homemade red velvet brownies that are sure to impress any gathering or simply satisfy your sweet tooth!
By following these simple steps, baking can be an enjoyable and rewarding experience. Plus, remember, the best memories are often made in the kitchen!
Variations on Best Homemade Red Velvet Brownies
Red velvet brownies aren’t just delicious—they’re versatile! Let’s dive into some fantastic variations that ensure everyone can enjoy the best homemade red velvet brownies.
Indulgent Brownies with Nuts
If you love a bit of crunch, consider adding chopped nuts to your brownies. Whether you prefer walnuts, pecans, or even macadamia nuts, the nutty texture pairs excellently with the rich, chocolatey flavor of red velvet. Just fold in about half a cup of your chosen nuts into your batter for a delightful twist. This adds not only texture but also an extra layer of flavor that elevates the experience.
Gluten-Free Delight
For those mindful of gluten, making gluten-free best homemade red velvet brownies is super simple! Opt for gluten-free flour blends, which can seamlessly replace all-purpose flour. Brands like Bob’s Red Mill or King Arthur Flour offer amazing alternatives that won’t compromise taste or texture. Also, try a recipe with almond flour for a moist and nutty flavor. The brownies will still come out rich and decadent while accommodating your dietary needs.
Vegan Version for Everyone
If you’re leaning into veganism, you can still relish these beauties! Swap out eggs for unsweetened applesauce or ground flaxseeds mixed with water. Use dairy-free butter and chocolate chips to keep the recipe entirely plant-based. Your friends will be amazed that these heavenly best homemade red velvet brownies are vegan—trust me, they won’t taste the difference!
Experimenting with these variations not only caters to different preferences but also enhances your baking skills. Which version will you try first?
Cooking Tips and Notes for Best Homemade Red Velvet Brownies
Tips for achieving that perfect texture
To ensure your best homemade red velvet brownies turn out incredibly fudgy and moist, use high-quality ingredients. Opt for unsweetened cocoa powder and fresh eggs; they make a noticeable difference! When mixing, aim for a combined consistency—overmixing can cause dryness, while undermixing can lead to uneven baking. For added richness, consider folding in chopped nuts or chocolate chunks.
Common pitfalls to avoid
Avoid the temptation to skip the cooling step; letting your brownies cool completely ensures they set up perfectly. One common mistake is not lining your baking pan. Use parchment paper to prevent sticking and make cutting easier. Keep an eye on the baking time; start checking for doneness a few minutes before the recipe suggests. For more tips, check out this useful resource on baking essentials from Serious Eats.
With these hints, your best homemade red velvet brownies will impress everyone who takes a bite!
Serving Suggestions for Best Homemade Red Velvet Brownies
Pairing Your Brownies with Ice Cream
What could be more delightful than indulging in the best homemade red velvet brownies alongside a scoop of creamy ice cream? Vanilla bean is always a classic choice, but if you’re feeling adventurous, try pairing your brownies with cream cheese or even a rich chocolate fudge ice cream! The contrast of warm brownies with cold ice cream creates a heavenly melt-in-your-mouth experience. If you’re hosting a gathering, consider creating an ice cream sundae bar with toppings like crushed nuts, sprinkles, and whip cream, inviting your guests to craft their perfect dessert.
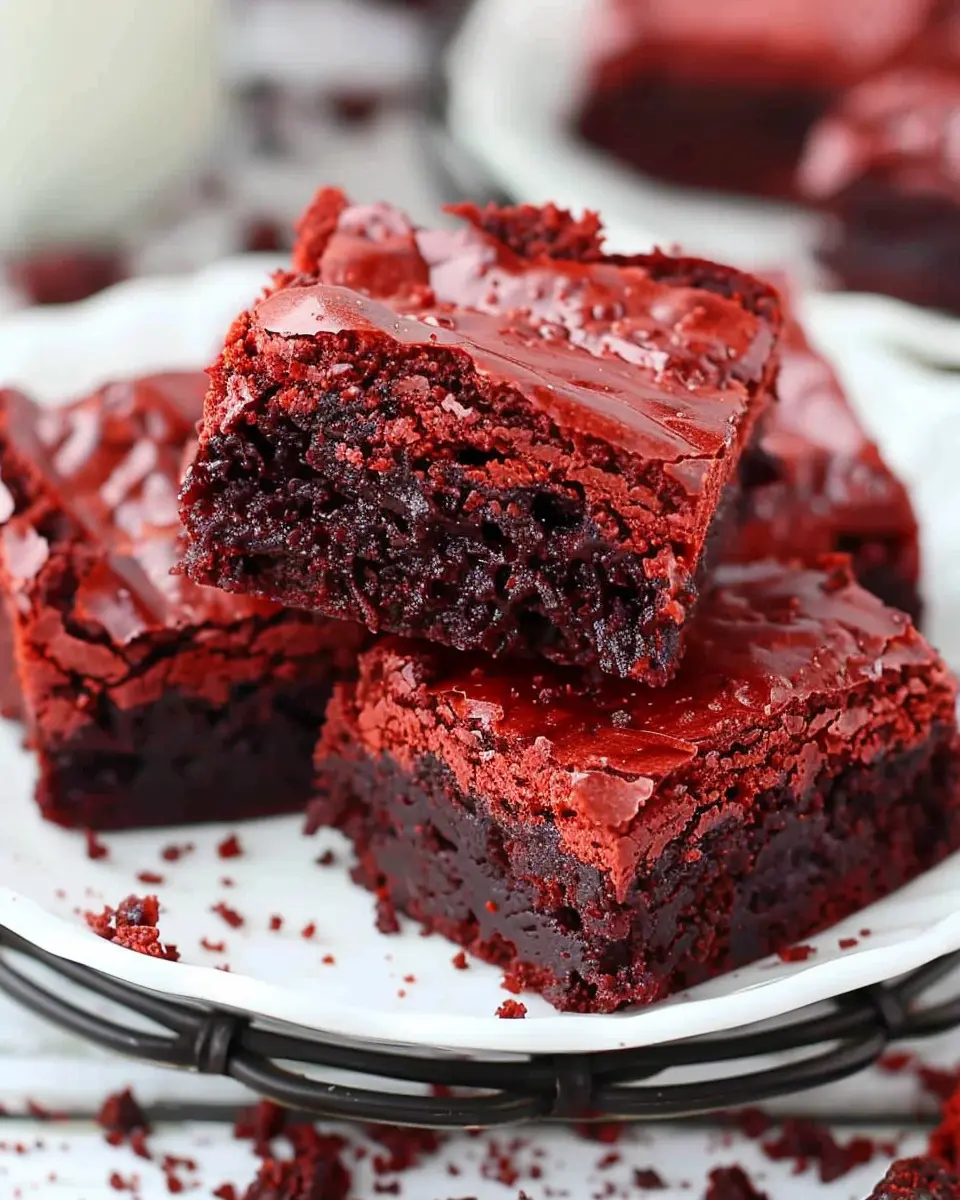
Creative Presentation Ideas
Presentation is key when serving desserts, and your best homemade red velvet brownies deserve some flair! Cut the brownies into bite-sized squares and stack them on a decorative plate. Consider drizzling a cream cheese glaze or a simple chocolate sauce over the top for a touch of elegance. For an extra pop, garnish with fresh berries or mint leaves. You might even try serving the brownies in cupcake liners to give guests an individual treat that’s both charming and easy to handle.
For more ideas on dessert presentation, check out resources from The Kitchn. Whether it’s for a casual dinner or a festive celebration, elevating the way you serve your brownies can make a significant difference.
Time Breakdown for Best Homemade Red Velvet Brownies
Creating the best homemade red velvet brownies is a delightful endeavor that fits perfectly into any busy schedule. Here’s a quick time breakdown to help you plan your baking adventure.
Preparation Time
Gather all your ingredients and tools—this step usually takes about 15 minutes. Prepping your workspace makes the baking process smoother, and let’s be honest, who doesn’t love a tidy kitchen?
Baking Time
Once everything’s ready, pop your brownie batter into the oven. The baking process typically takes around 25-30 minutes. Make sure you keep an eye on them, so they come out perfectly gooey!
Cooling Time
After baking, it’s essential to let your brownies cool. This usually takes about 30 minutes. Trust us; this cooling period is vital for the ideal texture and flavor development.
Total Time
So, what’s the grand total? You’ll need about 1 hour and 15 minutes from start to finish. Set aside this time, and you’ll be rewarded with a batch of decadent, best homemade red velvet brownies to share (or not!).
For more tips on baking, check out resources like the American Baking Association to explore further. Happy baking!
Nutritional Facts for Best Homemade Red Velvet Brownies
Calories per serving
When indulging in these best homemade red velvet brownies, you can expect approximately 250 calories per serving. This balance makes them a delightful treat that’s not overly guilt-inducing.
Sugar content
Each brownie contains around 18 grams of sugar. While it’s wise to enjoy them in moderation, the rich sweetness perfectly complements the cocoa and cream cheese layers.
Key nutrients
These luscious brownies also offer some beneficial nutrients:
- Vitamin A: Essential for vision and immune function, thanks to the red food coloring.
- Iron: Important for blood health, coming from the cocoa powder.
- Calcium: Found in the cream cheese frosting, it supports strong bones.
For a deeper dive into the nutritional benefits of the ingredients used, check out Healthline for insightful articles.
FAQs about Best Homemade Red Velvet Brownies
Can I substitute ingredients in the recipe?
Absolutely! If you’re eyeing the best homemade red velvet brownies recipe but don’t have all the ingredients on hand, substitutions are often a breeze. For instance, if you’re out of buttermilk, mixing milk with a bit of vinegar or lemon juice can do the trick. Vegetarian options like applesauce or mashed bananas can replace eggs in a pinch for a fudgier texture. And don’t hesitate to swap regular cocoa powder for Dutch-processed if that’s what you have in your pantry. Just keep in mind that it may affect the flavor slightly!
How can I store leftover brownies?
Storing your leftover best homemade red velvet brownies is simple. Place them in an airtight container at room temperature for up to three days. If you’re looking to keep them fresh longer, consider refrigerating them. They can last for a week in the fridge, though they may lose some of that soft, gooey texture. For extended storage, freeze them in an airtight container or freezer bag, separating layers with parchment paper. They can last up to three months this way!
What’s the best way to reheat brownies?
When you’re ready to indulge in those delicious brownies again, reheating them properly is key. For best results, preheat your oven to 350°F (175°C) and warm the brownies for about 10 minutes. If you’re short on time, popping them in the microwave for about 10-15 seconds will also work—just keep an eye on them to avoid drying out. Pair them with a scoop of ice cream or a sprinkle of powdered sugar for an extra touch!
For more tips and in-depth techniques, check out Baker’s Journal and The Perfect Brownie for expert advice.
Conclusion on Best Homemade Red Velvet Brownies
Recap of why these brownies are a must-try
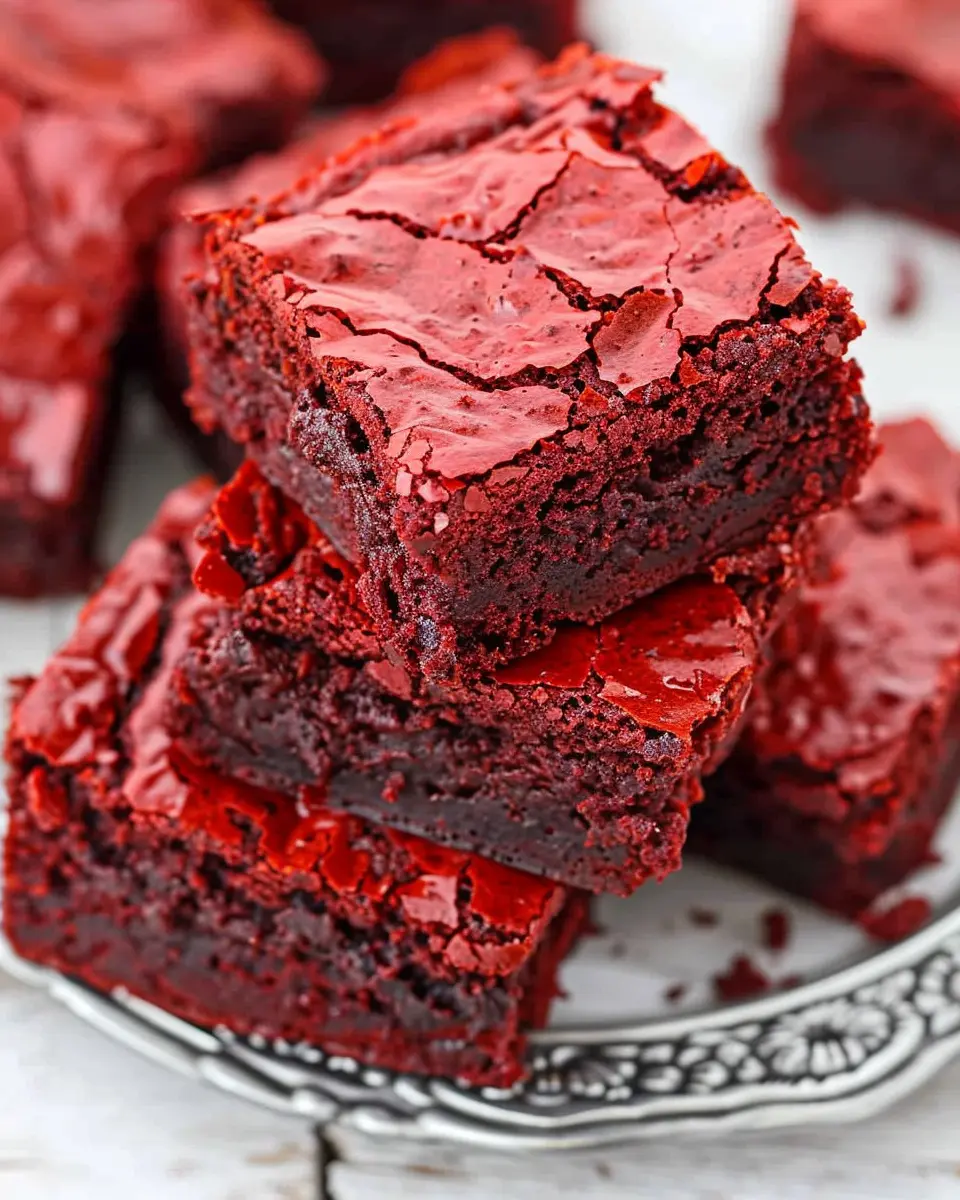
In summary, these best homemade red velvet brownies are a delightful treat that merges the classic flavor of red velvet cake with the chewy texture of brownies. They are perfect for any occasion, whether you’re celebrating a birthday or simply indulging in a weekend dessert.
These brownies are not only visually striking with their rich red color but also captivating with their velvety chocolate taste. Imagine biting into a soft, fudge-like brownie topped with a creamy cream cheese frosting—pure bliss!
Trust me, once you try these, they’ll become a staple in your dessert rotation. For more inspiration, check out resources from Food Network or Bon Appétit. Happy baking!
PrintBest Homemade Red Velvet Brownies: Indulgent & Easy to Make
Indulge in the rich and velvety taste of these homemade red velvet brownies, perfect for any occasion.
- Prep Time: 15 minutes
- Cook Time: 30 minutes
- Total Time: 45 minutes
- Yield: 12 brownies 1x
- Category: Dessert
- Method: Baking
- Cuisine: American
- Diet: Vegetarian
Ingredients
- 1 cup all-purpose flour
- 1 cup granulated sugar
- 1/2 cup unsweetened cocoa powder
- 1/2 cup vegetable oil
- 2 large eggs
- 1 tablespoon red food coloring
- 1 teaspoon vanilla extract
- 1/2 teaspoon baking soda
- 1/4 teaspoon salt
- 1/2 cup white chocolate chips
Instructions
- Preheat the oven to 350°F (175°C) and grease a baking pan.
- In a bowl, mix the flour, cocoa powder, baking soda, and salt.
- In another bowl, combine the oil, sugar, eggs, food coloring, and vanilla.
- Gradually add the dry ingredients to the wet ingredients and mix well.
- Fold in the white chocolate chips.
- Pour the batter into the prepared pan and smooth the top.
- Bake for 25-30 minutes or until a toothpick comes out clean.
- Let cool before cutting into squares and serving.
Notes
- For a richer flavor, you can add a pinch of espresso powder.
- These brownies are best served fresh but can be stored for up to three days in an airtight container.
Nutrition
- Serving Size: 1 brownie
- Calories: 250
- Sugar: 20g
- Sodium: 150mg
- Fat: 12g
- Saturated Fat: 3g
- Unsaturated Fat: 6g
- Trans Fat: 0g
- Carbohydrates: 34g
- Fiber: 2g
- Protein: 3g
- Cholesterol: 40mg
Keywords: best, homemade, red velvet, brownies, easy