
Introduction to Strawberry Pie Bars
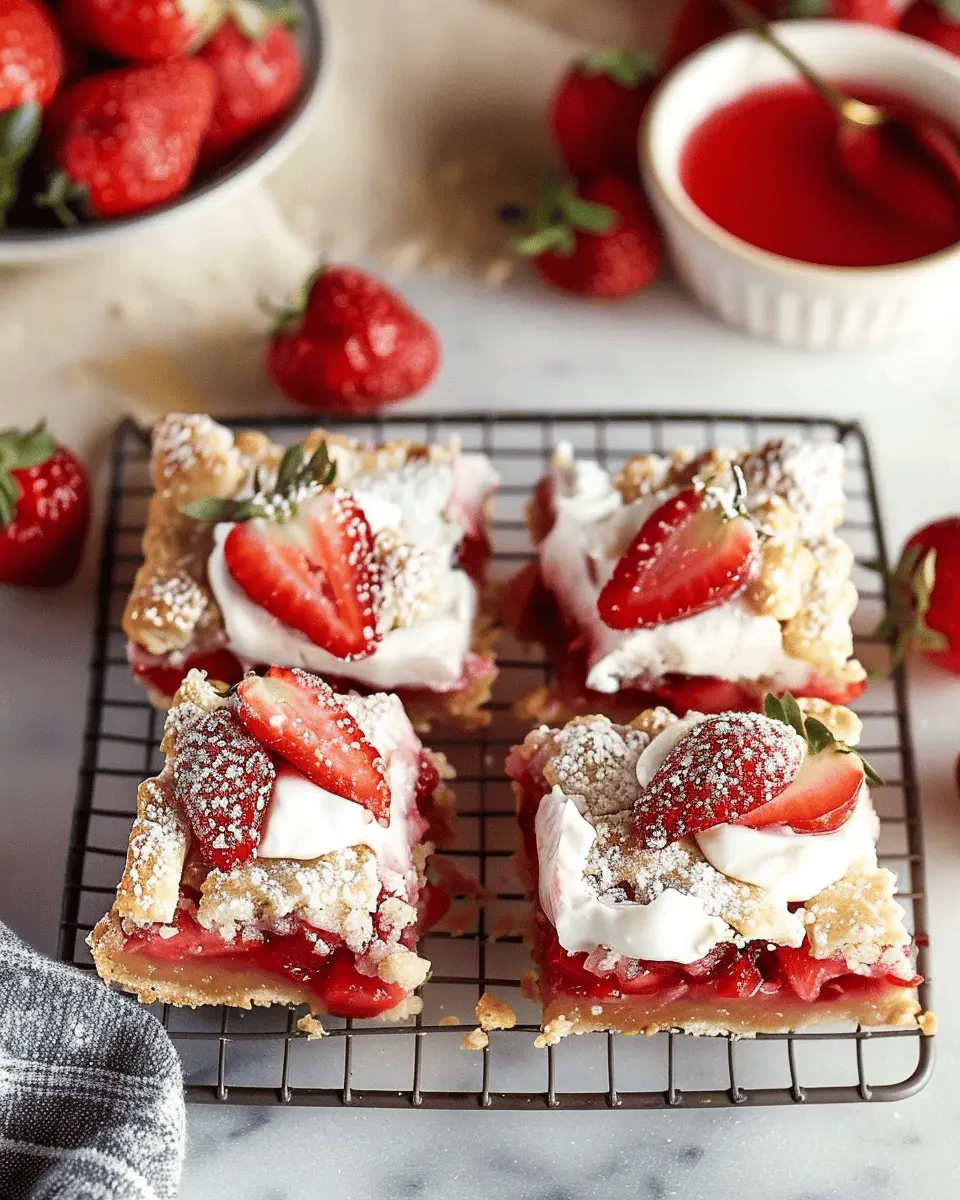
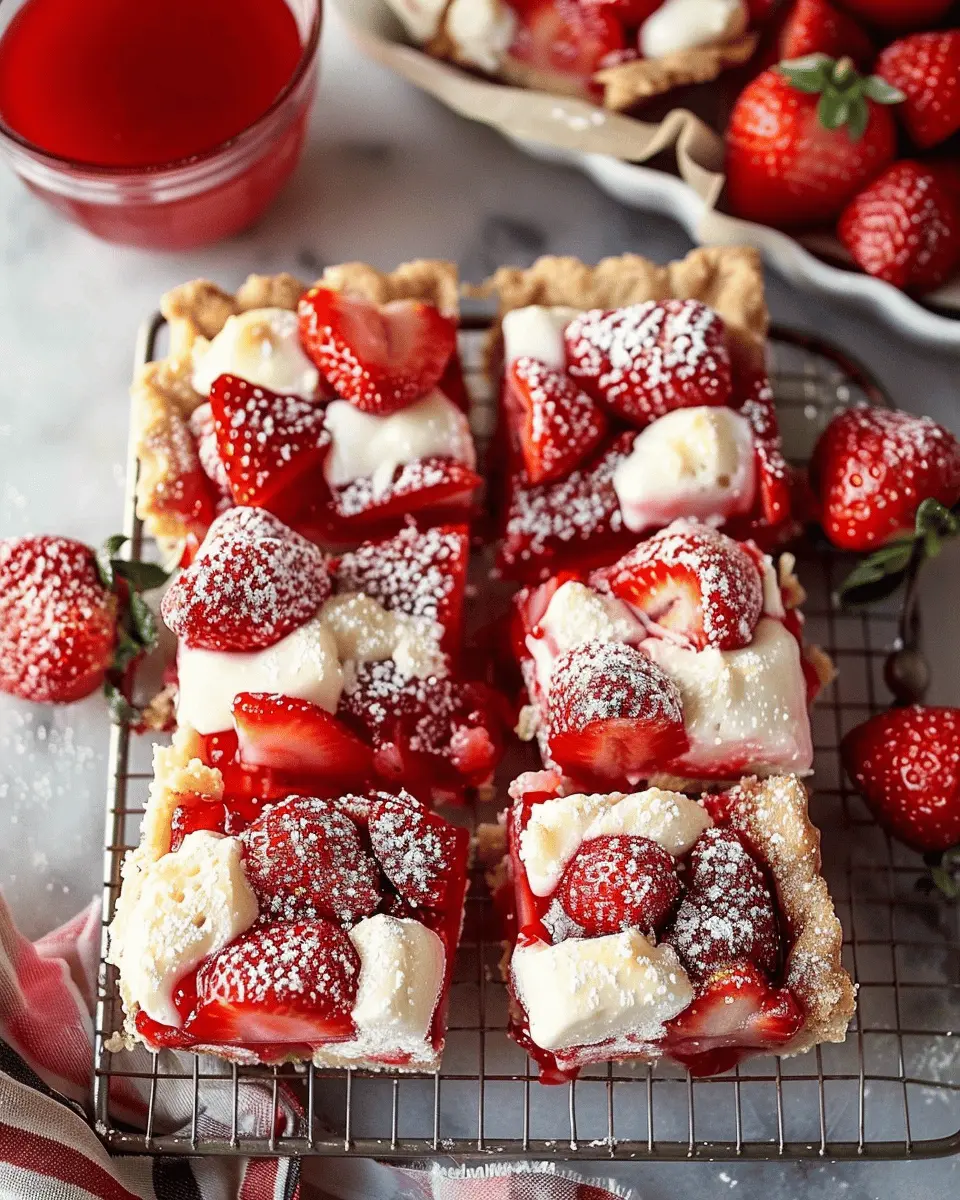
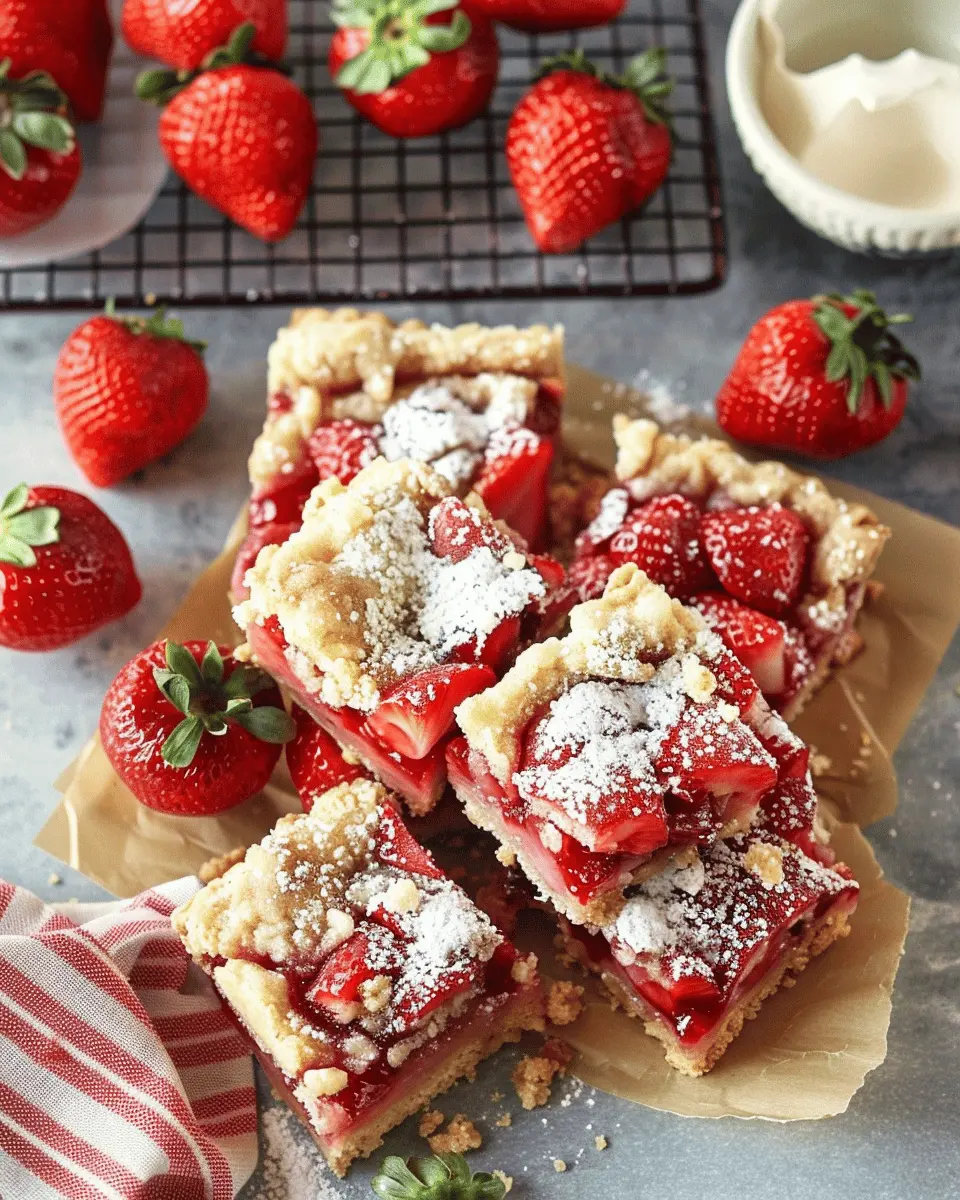
When the temperatures rise, nothing quite captures the essence of summer like a batch of strawberry pie bars. These delightful treats not only satisfy your sweet tooth but also showcase the bright, fresh flavors of the season. Imagine biting into a chewy, buttery crust layered with luscious strawberry filling, all topped with a sprinkle of crumbly goodness. It’s like enjoying a slice of summer sunshine in each bite.
Why are strawberry pie bars the perfect summer treat?
Strawberry pie bars embody everything we love about summer—fresh fruit, vibrant colors, and that perfect balance of sweet and tart. With strawberries being in peak season during the warmer months, these bars celebrate the fruit at its best. You might find yourself at local farmers' markets, eagerly picking out the ripest strawberries to make this recipe even more special. Did you know that strawberries are not only delicious but also packed with vitamin C and antioxidants? They’re a fitting centerpiece for your summer desserts.
Why choose strawberry pie bars over traditional pie, you ask? For one, they’re incredibly easy to make and perfect for sharing. Whether you’re hosting a backyard barbecue, attending a potluck, or just enjoying a cozy night with friends, these bars cut neatly into squares for easy serving. Plus, they don’t require the fuss of pie crust rolling—just press that crumbly crust into the pan, fill it with strawberry goodness, and bake.
Maybe you have some fond memories of making strawberry desserts with family or friends. Each bite holds a story, a smile, or a laughter-filled moment. It’s these nostalgic connections that elevate food from mere sustenance to cherished memory. Whipping up strawberry pie bars not only gives you a treat to enjoy but also rekindles those sweet moments.
For more inspiration, be sure to check out Food Network's guide on strawberries for some tips on selecting the best berries for your recipe!
So, are you ready to bring a touch of summer to your kitchen with these strawberry pie bars? Let’s dive into the recipe and create something delightful together!
Ingredients for Strawberry Pie Bars
When it comes to making delightful strawberry pie bars, having the right ingredients is essential for achieving that perfect balance of flavors and textures. Let's dive into what you'll need!
Essential ingredients for the crust
A buttery, flaky crust serves as the foundation for your strawberry pie bars. Here’s what you’ll need:
- All-purpose flour: This will give your crust that ideal structure.
- Granulated sugar: A bit of sweetness balances out the tartness of the strawberries.
- Unsalted butter, softened: Adds richness and helps create a tender texture.
- Salt: Just a pinch enhances the flavors and brings everything together.
- Ice water: A little bit helps to bind the ingredients without making the dough tough.
By following simple techniques for making pie crust, you’ll create a base that’s both flaky and delicious. Check out this guide on making perfect pie crust for some helpful tips!
Delicious components for the strawberry filling
Now, let's talk about that scrumptious filling that will take your strawberry pie bars to the next level:
- Fresh strawberries: The star of the show! Make sure they're ripe for optimal flavor.
- Granulated sugar: Helps to draw out the juices from the strawberries and sweetens the filling.
- Cornstarch: This thickening agent ensures your filling has that perfect, sliceable consistency.
- Lemon juice: A splash adds brightness and enhances the strawberry flavor.
- Vanilla extract: A hint of vanilla rounds out the taste beautifully.
Combining these ingredients will give you a filling that's not only vibrant but also irresistibly tasty. Feel free to explore using different berries for a mixed berry twist—variety is the spice of life!
Preparing Strawberry Pie Bars
Creating strawberry pie bars is not only a delightful process but also a rewarding one, especially when the smell of sweet strawberries fills your kitchen. Whether you're preparing them for a weekend gathering or a cozy night in, these bars are sure to impress. Let’s dive into the steps of making them, so you can enjoy every bite!
Preheat and Prepare Your Pan
First things first: you need to set the stage for your delicious creation. Preheat your oven to 350°F (175°C). It’s essential to have the oven ready so your bars bake evenly. While the oven warms up, grab a 9x13-inch baking pan. Line it with parchment paper, leaving some overhang on the sides. This little trick will make it much easier to lift out the bars later for cutting.
Do you have a favorite baking pan? An aluminum pan might provide even heat distribution, giving your bars a more consistent bake. If you prefer glass, just keep an eye on them to prevent over-baking.
Create the Crust Mixture
Now let’s get to the fun part: creating the crust! In a mixing bowl, combine the following ingredients:
- 1 cup all-purpose flour
- ½ cup granulated sugar
- ¼ teaspoon salt
- ¼ cup cold unsalted butter, cut into cubes
- ¼ cup old-fashioned oats
Using a pastry cutter or your fingertips, work the butter into the dry ingredients until the mixture resembles coarse crumbs. The oats add a delightful texture, reminiscent of a crisp summer day.
If you’re feeling adventurous, consider substituting half of the flour with almond flour for a nuttier flavor.
Press the Crust and Bake
Once your mixture is ready, transfer it to the prepared baking pan. Use your hands or the back of a spatula to press the mixture evenly into the bottom of the pan. It should form a solid base for your strawberry pie bars.
Bake the crust in the preheated oven for about 15 minutes or until it turns lightly golden. Keep an eye on it; no one wants overcooked crust ruining the magic of the strawberries!
Prepare the Strawberry Filling
While your crust bakes, let’s focus on the star of the show: the strawberries. You’ll need about 2 cups of fresh strawberries to make a juicy filling. Here’s how to prepare them:
- Wash and hull the strawberries, removing the stems.
- Slice them into small chunks.
- In a mixing bowl, combine the strawberries with ¼ cup sugar and 1 tablespoon cornstarch for thickening.
Allow the mixture to sit for about 10 minutes. This will help draw out some of the juices from the strawberries, creating a luscious filling.
For a little extra flavor, consider adding a splash of lemon juice or a pinch of cinnamon—both elevate the taste remarkably. If you’re curious about the health benefits of strawberries, consider this: they are packed with vitamins and antioxidants! (Check the CDC’s website for more info.)
Assemble the Bars and Bake Again
Once both the crust and filling are ready, it’s time to assemble your strawberry pie bars. Spread the strawberry mixture evenly over the baked crust.
Optional: For a crunchy topping, sprinkle some reserved crust mixture over the strawberry filling.
Now, return the assembled bars to the oven and bake for an additional 25-30 minutes, or until the filling is bubbly and the top is golden.
When you pull your strawberry pie bars from the oven, resist the urge to slice them immediately! Let them cool in the pan, allowing the filling to set properly. Once cool, lift them out using the parchment overhang, slice, and savor each delicious piece.
Enjoy these sweet and tart bars as a dessert or snack, and don't forget to share with friends—they are sure to love them as much as you do!
Variations on Strawberry Pie Bars
Strawberry-Rhubarb Pie Bars
If you're looking to jazz up your strawberry pie bars, consider adding rhubarb to the mix. This delightful pairing combines the brightness of strawberries with the tartness of rhubarb, creating a perfect balance of flavors. Simply replace half the strawberries with chopped rhubarb.
- Pro tip: To soften the rhubarb and enhance its flavor, lightly cook it with a sprinkle of sugar before mixing it into your filling.
Not only is this variation delicious, but rhubarb is also rich in antioxidants, offering health benefits alongside its delectable taste. To dive deeper into the nutritional benefits of rhubarb, check out the Rhubarb Research Center.
Gluten-Free Strawberry Pie Bars
For those adhering to a gluten-free lifestyle, worry not! You can still enjoy scrumptious strawberry pie bars. Simply swap out regular flour for a gluten-free blend. Here’s how:
- Use a 1:1 gluten-free all-purpose flour for the crust and filling.
- Make sure to check labels on your baking powder, as some contain gluten.
This gluten-free version does not compromise on flavor and taste. In fact, many find that gluten-free baking offers a unique texture that can be remarkably satisfying. If you're unsure where to find quality gluten-free flour, check out local health food stores or online retailers like Bob's Red Mill.
Feel free to get creative with these variations! Your strawberry pie bars can be a canvas for experimenting with different flavors and dietary needs, making them a crowd-pleaser no matter the occasion. What’s your favorite twist on this classic dessert?
Cooking Tips and Notes for Strawberry Pie Bars
Essential equipment and tools
To whip up delightful strawberry pie bars, having the right tools can make all the difference. Here’s what you'll need:
- 9x13-inch baking dish: Ideal for these bars, ensuring even cooking.
- Mixing bowls: Different sizes for mixing ingredients and keeping things tidy.
- Rubber spatula: Perfect for scraping every delicious bit from bowls.
- Parchment paper: A game-changer for easy removal and cleanup.
- Whisk: Useful for blending dry ingredients smoothly before combining with wet ones.
Common mistakes to avoid
Even a simple recipe can trip you up if you’re not careful. Avoid these pitfalls for top-notch strawberry pie bars:
- Overmixing: This can lead to tough bars. Mix just until combined.
- Underbaking: Keep an eye on the time! Overly gooey bars signal they need more time in the oven.
- Using underripe strawberries: Choose ripe, sweet strawberries for the best flavor. Make sure they're fresh and properly hulled.
By following these tips, you'll be on your way to making perfect strawberry pie bars every time! If you're curious about flavor variations or storage tips, check out additional resources like Taste of Home for inspiration!
Serving Suggestions for Strawberry Pie Bars
When you're ready to indulge in your strawberry pie bars, consider these delightful serving suggestions that will elevate your dessert experience.
Best toppings to enhance the bars
The beauty of strawberry pie bars lies not just in their taste but also in how you can personalize them. Here are a few topping ideas to take these bars to the next level:
- Whipped Cream: A dollop of freshly whipped cream can add a light, airy contrast.
- Vanilla Ice Cream: The classic combo! Serving these bars warm with a scoop of vanilla ice cream is blissful.
- Fresh Strawberries: Add some sliced strawberries on top for freshness and vibrant color.
- Chocolate Drizzle: Who can resist a little chocolate? A light drizzle can create a beautiful and indulgent touch.
Ideal pairings for serving
To make the most of your strawberry pie bars, think about what you’ll serve alongside them:
- Coffee or Tea: A warm cup of coffee or tea makes for a comforting pairing. Both enhance the flavors wonderfully!
- Fruit Salad: A light fruit salad on the side can provide refreshing balance.
- Sparkling Water: For a non-alcoholic option, a flavored sparkling water can cleanse your palate nicely.
With these serving suggestions, your strawberry pie bars will surely be the star of the dessert table. Give them a try and make your next gathering unforgettable!
Time Breakdown for Strawberry Pie Bars
When you're setting out to make strawberry pie bars, knowing how to plan your time can be a game changer! Here's a quick breakdown to keep you organized.
Preparation time
Gathering your ingredients and prepping the crust will take about 20 minutes. This is the perfect time to enjoy some music or prep a few other things for your day.
Baking time
Once your mixture is ready, pop those strawberry pie bars into the oven! They’ll need about 30-35 minutes to achieve that golden, delicious crust while the strawberries bubble away.
Total time
All in all, you’re looking at around 1 hour to whip up these delightful treats from start to finish. So, whether you’re enjoying a cozy evening or prepping for a gathering, these strawberry pie bars are an effortless and tasty addition you’ll be proud to share! If you're curious about more baking tips, check out King Arthur Baking for expert advice!
Nutritional Facts for Strawberry Pie Bars
Calories per bar
Each delicious serving of strawberry pie bars contains approximately 180 calories. This makes them a sweet but manageable treat for your day, perfect for satisfying a midday sugar craving without derailing your healthy eating goals.
Key nutrients
These bars aren’t just about calories; they're loaded with nutrition! Here’s what you can expect:
- Fiber: Thanks to the oats and strawberries, each bar offers about 3 grams of fiber, aiding digestion and keeping you fuller for longer.
- Vitamin C: Strawberries are a fantastic source of this vitamin, providing about 50% of your daily needs in each serving.
- Healthy Fats: Incorporating nut butter or coconut oil gives you a dose of healthy fats, essential for overall health.
For more insight on the nutritional benefits of strawberries, check out sources like Healthline. Enjoy these strawberry pie bars as part of a balanced diet!
FAQs about Strawberry Pie Bars
Can I substitute other fruits in this recipe?
Absolutely! Strawberry pie bars are wonderfully versatile. While strawberries are a delightful choice, you can easily swap in other fruits like blueberries, raspberries, or peaches. Just keep in mind that different fruits have varying levels of sweetness and moisture, so you may need to adjust the sugar and thickening agents accordingly. For example, if you choose to use peaches, you might add a dash of lemon juice to enhance their flavor, creating a delightful twist!
How do I store leftover strawberry pie bars?
Storing leftover strawberry pie bars is a breeze. Simply allow the bars to cool completely, then cover them with plastic wrap or transfer them to an airtight container. They can be kept in the refrigerator for up to five days. If you want to prolong their shelf life, consider freezing them! Wrap each bar tightly in plastic wrap and place them in a freezer-safe bag. They can last for up to three months frozen. To enjoy, just allow them to thaw in the fridge overnight before serving.
What can I use instead of tapioca?
If you don't have tapioca on hand for your strawberry pie bars, don't worry! Cornstarch serves as a fantastic substitute. Use about half the amount of cornstarch compared to tapioca, as it thickens more quickly. You could also try arrowroot or potato starch as alternatives. Each option has its properties, so experiment a little to see which one you prefer!
For more tips on fruit substitutions and storage, check out resources like Taste of Home or Serious Eats.
Conclusion on Strawberry Pie Bars
Why You Should Try Making These at Home!
If you haven’t yet delved into making strawberry pie bars, you’re truly missing out. These delightful treats are not only visually appealing but also bursting with flavor, making them perfect for gatherings or a sweet indulgence at home.
- Fresh Ingredients: Elevate your baking by using fresh strawberries, which can often be found at a nearby farmer’s market or grocery store.
- Easy Preparation: Whipping up these bars is simpler than you might think. Even beginner bakers can master this recipe.
- Versatile Delight: Customize them with your favorite toppings, be it whipped cream or additional fruit.
Imagine biting into a sweet, juicy bar, perfectly sweetened and baked to golden perfection. What’s not to love? Give these a try, and treat yourself and others to a delicious homemade dessert that will surely impress! For more baking inspiration, check out resources like Serious Eats or Bon Appétit.
Leave a Reply